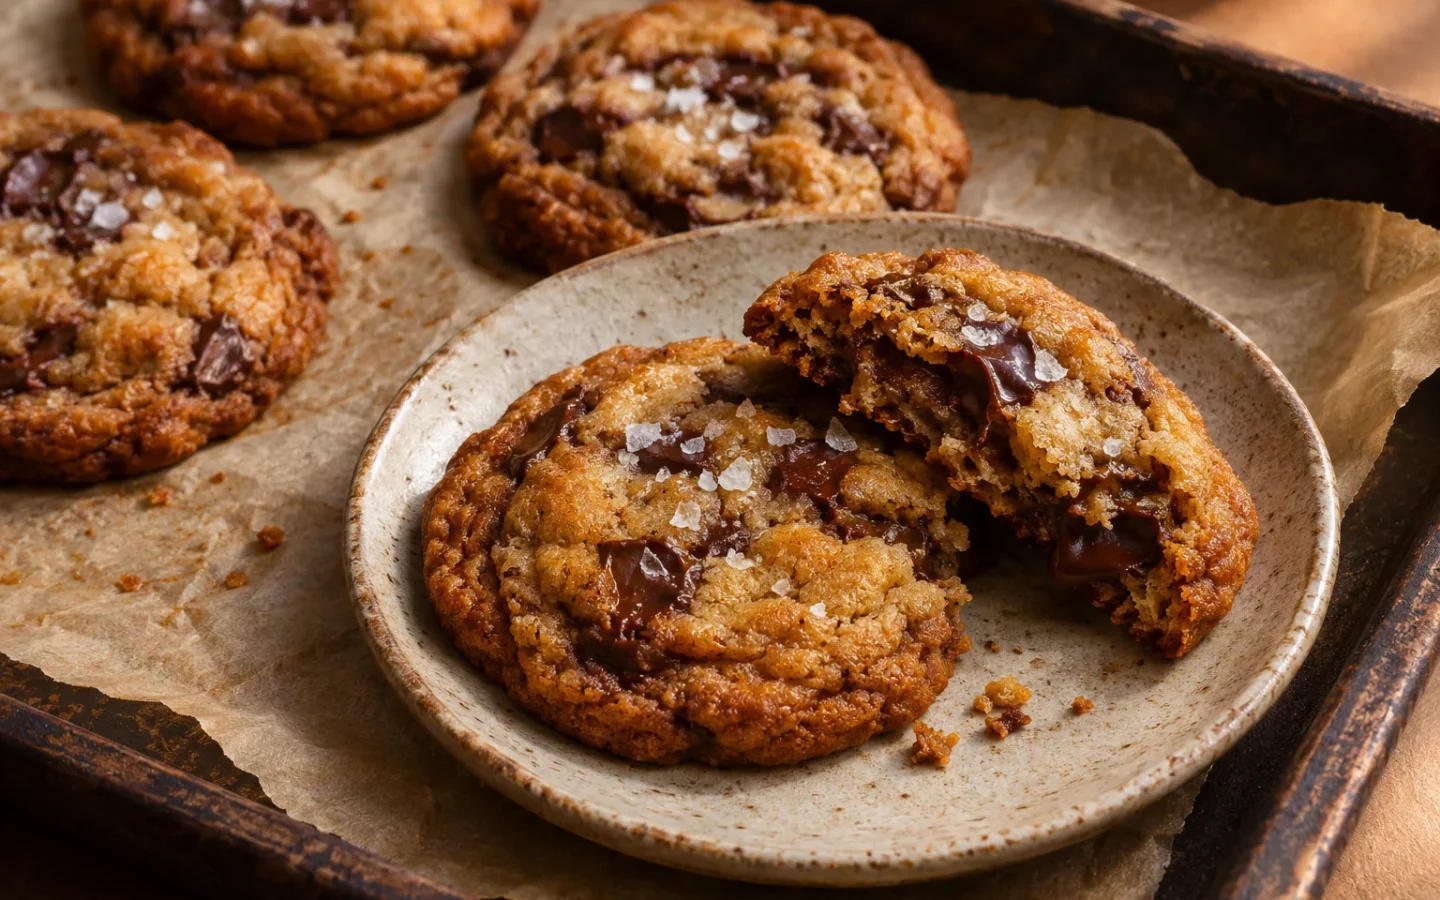
Chewy chocolate chip cookies built on nutty brown butter and white miso, with caramelized edges, dark chocolate pockets, and measured salt.
Introduction
Brown butter miso chocolate chip cookies use two savory ingredients to deepen a familiar dessert. Brown butter contributes toasted milk solids and a hazelnut-like aroma. White miso adds salt, fermentation, and a rounded umami note that makes chocolate taste darker and caramel taste longer. Neither should announce itself as a separate flavor; the best cookie still reads immediately as chocolate chip.
Browned butter became one of the prominent flavor stories of 2026, praised for turning a simple ingredient into a roasted, aromatic sauce. Cookies are an ideal use because the technique changes both flavor and dough behavior. Browning evaporates part of butter’s water, so this formula replaces a measured amount with cold water. That small correction prevents dry, greasy cookies and keeps enough moisture for a chewy center.
The recipe is written by weight because miso density, flour packing, and chopped chocolate can make volume measurements unreliable. A one-hour chill hydrates flour and controls spread; an overnight rest intensifies caramel flavor. The instructions explain exactly when brown butter is ready, how cool it should be before the egg is added, and how to judge doneness when the centers still look soft.
Time
| Stage | Duration |
|---|---|
| Preparation time | 30 minutes |
| Cooking time | 12 minutes |
| Chilling time | 60 minutes |
| Total time | 102 minutes |
Active preparation takes about 30 minutes, baking takes 11 to 13 minutes per tray, and the dough needs at least one hour of chilling. Brown butter must cool for 15 to 20 minutes before mixing so it does not scramble the egg or dissolve every sugar crystal. The total time for one tray is roughly 1 hour 45 minutes. For deeper flavor and a thicker cookie, refrigerate the covered dough for up to 24 hours.
Needed equipment
| Tool | Why it helps |
|---|---|
| Light-colored saucepan | Shows the color of milk solids before they cross from brown to burned. |
| Digital kitchen scale | Essential for consistent flour, butter, and dough portions. |
| Heatproof mixing bowl | Receives hot brown butter and stops residual pan heat. |
| Whisk and flexible spatula | A whisk emulsifies wet ingredients; a spatula folds flour without overmixing. |
| Two light-colored sheet pans | Dark pans can overbrown the cookie bottoms. |
| Parchment paper and 3-tablespoon scoop | Support even portions and clean release. |
| Wire cooling rack | Lets steam escape so edges stay crisp. |
Tags
Brown Butter Cookies, Miso Desserts, Chocolate Chip Cookies, Baking, Sweet and Savory.
These tags describe the technique, central ingredients, and serving context. They are navigation aids, not guarantees for medical dietary needs; packaged products must still be checked individually.
Serving Size
This recipe yields 16 large cookies. Scale ingredients by weight where possible, and remember that pan area, batch size, chilling capacity, and cooking time may need to change when doubling the recipe.
Difficulty Level
Intermediate. The detailed method identifies the moments that require attention so a first-time cook can understand both the action and the intended result.
Allergen Information
Wheat, milk, egg, and soy; chocolate may contain milk, soy lecithin, or traces of nuts depending on the brand Ingredient formulas and cross-contact warnings vary by country and manufacturer. For a serious allergy, read every current label, use clean equipment, and avoid substitutions with uncertain production histories.
Dietary Preference
Vegetarian; not vegan; can be adapted with a tested gluten-free cup-for-cup flour but texture will change
Course
Dessert.
Cuisine
Japanese-American fusion. This label describes the recipe’s culinary frame and inspiration without claiming that a modern adaptation represents every regional or traditional version.
Ingredients
| Ingredient | Amount | Selection and purpose |
|---|---|---|
| Unsalted butter | 170 g / 3/4 cup | Browning reduces the final weight; use all the browned milk solids. |
| Cold water | 25 g / 1 tbsp plus 2 tsp | Replaces moisture lost while browning the butter. |
| White miso | 35 g / 2 tbsp | A mild shiro miso supports caramel without excessive salt. |
| Dark brown sugar | 160 g / 3/4 cup packed | Provides molasses flavor and chew. |
| Granulated sugar | 70 g / 1/3 cup | Encourages crisp edges and controlled spread. |
| Large egg | 1, about 50 g without shell | Use at room temperature for easier emulsification. |
| Egg yolk | 1 | Adds richness and chew without much extra water. |
| Vanilla extract | 2 tsp | Links caramel, chocolate, and toasted butter aromas. |
| All-purpose flour | 225 g / 1 3/4 cups spooned and leveled | Do not add extra flour to make the warm dough look stiff. |
| Baking soda | 3/4 tsp | Promotes browning and spread. |
| Fine sea salt | 1/4 tsp | Miso and chocolate also contribute sodium. |
| Dark chocolate | 200 g / 7 oz | Chop a 60-to-70-percent bar into mixed pieces for pockets and shards. |
| Flaky salt | 1/2 tsp, optional | Use sparingly after baking. |
Measuring and substitution strategy
Read the entire table before shopping. The notes explain function as well as quantity, which matters when making substitutions. Replace like with like: preserve fat with fat, acidity with acidity, and structural dry ingredients with tested equivalents. Spoon measures are level US measures. When both mass and volume appear, use mass for the most repeatable result.
Prepare and measure every ingredient before heat begins. This keeps fast steps from stalling and prevents accidental double additions. If an ingredient has a variable intensity—such as chile paste, miso, coffee concentrate, or flavored liqueur—taste it alone and begin at the lower end of the suggested adjustment.
Instructions
-
1. Brown the butter slowly
Melt butter in a light saucepan over medium heat. It will foam, crackle, and then quiet as water evaporates. Stir and scrape constantly once pale solids collect on the bottom. Remove the pan when the solids are amber-brown and the aroma is nutty. Black specks or a bitter smell mean it has burned and should be restarted.
-
2. Stop the cooking and restore moisture
Immediately pour the butter and every browned solid into a heatproof bowl. Whisk in 25 g cold water carefully; it may sputter. This replaces evaporated water and cools the butter. Let it stand 15 to 20 minutes until warm and fluid, not hot.
-
3. Blend in the miso
Whisk white miso into the warm brown butter until no pale lumps remain. Dissolving it in fat first distributes its salt and fermented flavor evenly. If the miso is especially firm, press it through a small sieve or mash it against the bowl before adding sugars.
-
4. Whisk the sugars and eggs
Add brown and granulated sugars and whisk for one minute. The mixture will look glossy but slightly grainy. Add the whole egg, yolk, and vanilla, then whisk vigorously for another minute until the batter thickens and falls in ribbons. A properly emulsified base limits greasy spread.
-
5. Combine the dry ingredients
In a separate bowl, whisk flour, baking soda, and fine salt. Break every soda clump because a pocket of leavener tastes metallic. Add the dry mixture to the butter base and fold only until a few flour streaks remain; continued mixing develops toughness.
-
6. Fold in the chocolate
Reserve a handful of attractive chocolate pieces for the tops. Fold the remainder into the dough, scraping the bottom so no dry flour hides beneath the heavy mixture. The dough may seem soft while the butter is warm; chilling, not extra flour, creates the correct consistency.
-
7. Portion before chilling
Scoop sixteen portions of about 48 to 50 g onto a lined tray. Press the reserved chocolate into the tops, then cover airtight. Pre-portioning is easier than digging into fully chilled dough and also ensures each cookie receives a balanced amount of chocolate.
-
8. Chill and preheat
Refrigerate for at least one hour or up to 24 hours. Near baking time, heat the oven to 350°F / 175°C with a rack in the center. Line a cool light-colored tray with parchment. Do not place dough on a sheet pan that is still warm from a previous batch.
-
9. Bake with enough space
Arrange six dough portions at least 3 inches apart. Bake 11 to 13 minutes, rotating once if the oven browns unevenly. The edges should look set and caramel-colored while the center remains puffed and slightly underdone. Carryover heat finishes the center on the tray.
-
10. Shape and cool
For round cookies, place a wide cutter around each hot cookie and make a gentle circular motion. Sprinkle only a few flakes of salt. Cool on the pan for eight minutes, then transfer to a rack. Moving sooner can break the soft centers; leaving them on the pan too long softens the edges.
Preparation Tips
- Brown butter by sight and smell, not a fixed minute count. Pan material and burner output change the pace.
- Weigh the finished brown butter if you want maximum precision: butter plus restored water should be close to the original 170 g.
- Use white miso rather than dark red miso for a gentler flavor and more predictable salt level.
- Chop chocolate into mixed sizes. Fine shards season the dough while larger pieces create molten pockets.
- Bake one test cookie first. If it spreads excessively, chill longer; if it barely spreads, flatten the next portions slightly.
Organization is part of the technique. Clear the work surface, keep ingredients that are ready to eat away from raw eggs or other raw proteins, and set a timer as a reminder rather than as the only doneness test. Appearance, aroma, texture, and temperature provide the final evidence.
Nutritional Information
Values are estimated per serving from the listed ingredients. Brands, absorbed oil, trimming, dilution, optional garnishes, and actual portion size change the result. This table is general information, not medical advice.
| Nutrient | Estimated amount per serving |
|---|---|
| Calories | 285 calories |
| Protein | 4 g |
| Carbohydrates | 34 g |
| Total fat | 16 g |
| Saturated fat | 9 g |
| Sodium | 230 mg |
| Dietary fiber | 2 g |
| Sugars | 22 g |
| Cholesterol | 48 mg |
For a medically prescribed diet, calculate with the exact products you use or consult a qualified clinician or registered dietitian. Sodium, sugar, caffeine, and alcohol are especially sensitive to brand and serving decisions.
Tips and Tricks
- Keep every brown speck: The toasted milk solids contain much of the characteristic aroma, so scrape the saucepan thoroughly.
- Correct moisture deliberately: Adding measured water prevents browning from silently changing the original butter balance.
- Trust the chill: Warm dough looks loose. Adding flour before it rests produces a cakier, drier cookie.
- Read the center correctly: A cookie pulled when the middle looks fully baked will be overdone after cooling. Look for set edges and a soft, matte-patched center.
Add-ons
Choose one variation at a time so the core balance remains clear.
- Toasted sesame: Fold in 20 g toasted sesame seeds for a nutty accent. Reduce flaky salt because sesame draws attention to savory notes.
- Walnuts or pecans: Replace 50 g chocolate with toasted chopped nuts. Check for nut allergies before serving.
- Espresso: Add one teaspoon instant espresso powder to the flour. It deepens chocolate without making the cookie taste like a latte.
- Milk chocolate balance: Replace one-quarter of the dark chocolate with milk chocolate for a sweeter cookie, but keep the majority dark so miso remains balanced.
Side dishes
Pair the recipe with contrast rather than more of the same dominant flavor.
- Cold milk: Its clean dairy flavor softens salt and dark chocolate.
- Unsweetened coffee: Bitterness contrasts with caramelized sugar and makes a small cookie feel complete.
- Vanilla ice cream: Sandwich a small scoop between two fully cooled cookies for a richer dessert.
- Fresh pears: Crisp, lightly floral fruit provides contrast without competing with miso.
Improvements
Use the finished result as evidence. Diagnose the specific issue before changing the next batch, and change one major variable at a time.
- Cookies spread too much: Dough or pans were warm, flour was undermeasured, or butter was not emulsified. Chill longer and use a cool tray before increasing flour.
- Cookies are thick and dry: Too much flour or overbaking is likely. Weigh flour, pull at set edges, and check that lost butter moisture was replaced.
- Miso tastes too strong: Use a milder white miso and reduce it by 5 to 10 g. Replace the removed weight with butter so dough structure changes minimally.
- Bottoms burn: Use a light pan, parchment, and the middle rack. Nest two sheet pans if the oven sends intense heat from below.
Save and store
Store completely cooled cookies in an airtight container at room temperature for up to four days. Add a small piece of bread to the container if you prefer soft centers, replacing it daily; the bread will stale as it donates moisture. Freeze baked cookies for up to two months and thaw covered at room temperature. Portioned raw dough freezes especially well: freeze balls solid on a tray, transfer to a labeled bag, and bake from frozen at 350°F / 175°C, adding two to four minutes. Keep raw dough refrigerated and use within three days because it contains egg.
Label stored components with the date and use clean, shallow containers where rapid cooling is needed. When handling history, time, temperature, or odor is uncertain, discard the food rather than relying on reheating to make it safe.
FAQ
Does miso make the cookies taste savory?
White miso adds complexity and salt more than an obvious soup-like flavor. At the measured amount, most tasters notice deeper caramel and chocolate. A dark miso will be stronger and saltier.
Can I skip browning the butter?
You can use melted butter, but the nutty flavor will be missing and the water balance will differ. Omit the added water when using ordinary melted butter and expect a lighter-tasting cookie.
Why add water after browning butter?
Butter contains water that boils away during browning. Replacing a measured amount restores steam, sugar dissolution, and dough hydration, making the cookie chewier and less greasy.
Can I make the dough ahead?
Yes. Refrigerate portioned dough airtight for up to 24 hours for best flavor, or freeze the portions for two months. Long refrigerator storage beyond three days is not recommended for raw egg dough.
Can I use chocolate chips?
Yes, but chopped bars create more varied pockets and thin streaks. Chips are designed to hold their shape, so the texture will be more uniform and less molten.
How do I know brown butter is burned?
Proper brown butter has amber solids and a nutty aroma. Burned butter has black particles, acrid smoke, and bitterness. Straining cannot remove burned flavor; start again.
Conclusion
Brown butter miso chocolate chip cookies are not improved by excess. The formula works because each concentrated ingredient has a limit: butter is toasted but not burned, miso seasons without dominating, chocolate stays dark enough to balance sugar, and flaky salt is optional rather than automatic. Weigh the ingredients, restore the butter’s lost moisture, chill the dough, and remove the tray while the centers are still soft. Those decisions produce crisp edges and a lasting chewy middle.
References
References support trend, safety, or ingredient context. The recipe proportions, editorial explanations, troubleshooting, and serving guidance are original to Love With Recipes.